DIY Spring Flowers Backdrop

The project I did for easter, spring flowers from tissue papers for backdrop. My friend found the idea in Pinterest, here is the link https://www.duitang.com/blog/?id=20891655.

The plan was I make the flowers and she makes the stem and leaves, then we will put them together. With one thing and another we changed the plan in the last minute, instead of having the flowers standing we will just attach them to the cardboard as cluster flowers then hang it to the wall.

easter decor 2

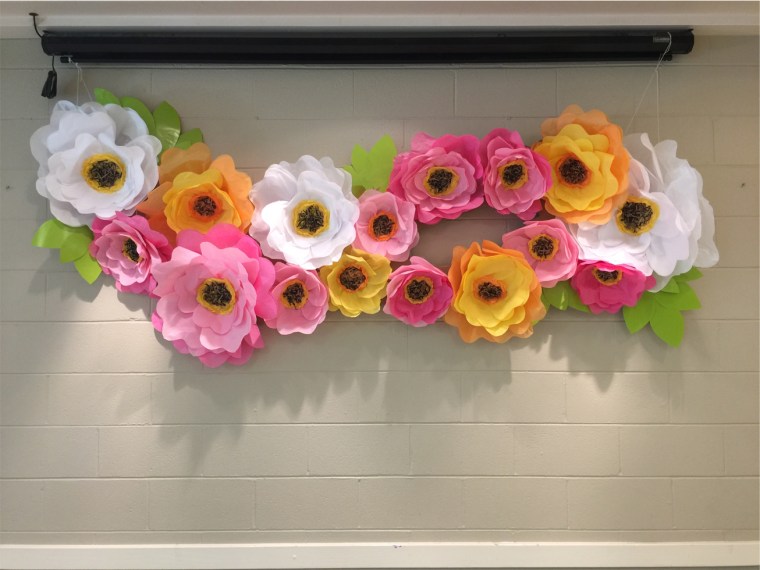
So here is the final backdrop. We cut the excess cardboard and added the leaves(my daughter’s origami paper).

easter decor 3

easter decor 4

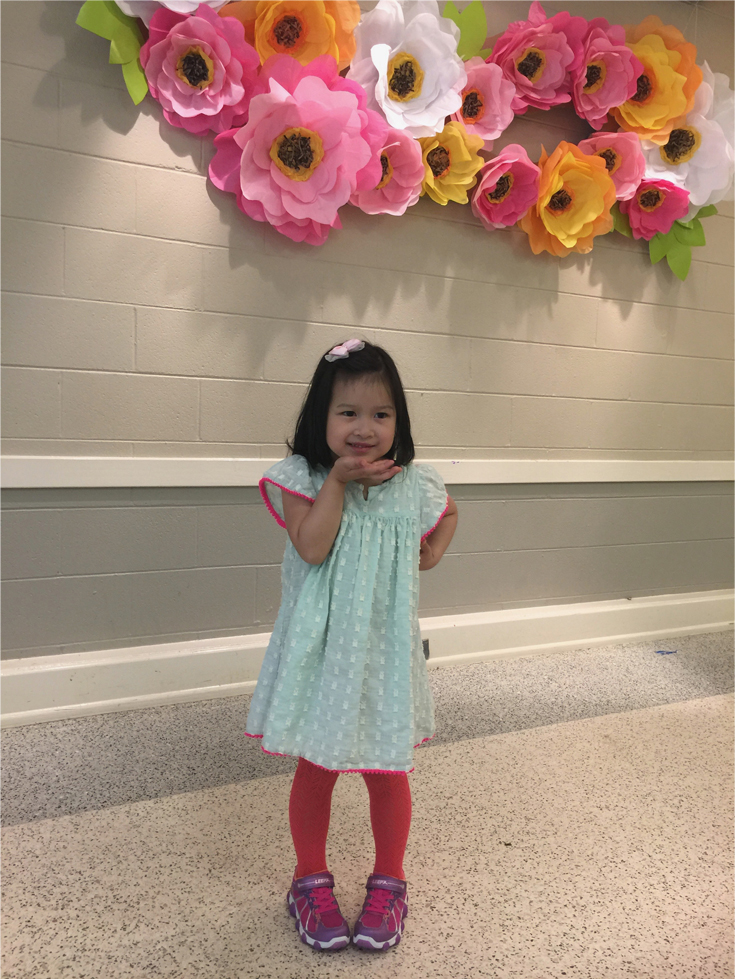
And here is my prettiest flower posing with the spring flowers backdrop.

easter decor

Hope it inspires you!

DIY Felt Donuts

My second felt project, Felt Donuts… they look pretty real to my little one she thought they are really for her afternoon snack 🙂

This is very fun project to make, you can personalized the frosting and sprinkles or toppings to whatever your imagination tells you.


Felt Donuts 1


The main material is brown felt for the donuts, as for the frosting I used whatever left over felt I had… you can also use scrap fabric.

Here is the tutorial, the pictures aren’t too good since I made them in the night.


Felt donut 2

  1. Prepare the felt for the donuts and frosting. For each donut you need 2 brown felt and 1 frosting. People usually use Disc as template, for this donut I cut it a litte bit smaller.
  2. Cut the outer edge of frosting felt to irregular shape, attach the sprinkle or toppings( buttons, felt pieces, beads) then sew the piece to the brown felt as pictured.
  3. Put another piece of brown felt on the top, sew the outer edge together.
  4. Flip inside out.
  5. Fill it with stuffings and hand sew close the inner edges.
  6. Done!


felt donut 3

DIY Rustic Picture Frame

Recently we just changed all the windows in our house, there were old one pane wood windows original to the house when it’s built. I actually like those old windows, though they look old and outdated but they were full of characters. Considering how much energy wasted if we keep using them, we decided to changed it, and our power bill went down right away the next month after installation.

I kept one window, picked the best looking one, and use it as picture frame. Instead of refinished it I used it as it was after cleaned it thoroughly. I like how its scratch, old paint, chips, dents, holes tells the story of it existence. Thank you for being the window for this house for 24 years and I’m grateful how it now serves its new role as Rustic Family Picture Frame.


Rustic Pic Frame 1

I printed the photos in black and white 6x8inch, I think this is the best in this project… Sepia will do well too.

Rustic Pic Frame 2


Make a mat to get a center and uniform position, so you don’t have to measure the frames one by one.

Rustic Pic Frame 3

Rustic Pic Frame 4


Love how it turned out. Hope this inspires you!

Rustic Pic Frame 5

DIY All Seasons Felt Strawberry

My little one was very excited when we visited strawberry farm during strawberry picking season last May. Since then she often says “petik strawberry” which means picking strawberry and tries to describe what she saw and did in that farm with her very limited vocabulary, so cute. So I made these felt strawberries last week, named it all seasons felt strawberries… she can now have strawberry picking whenever she wants. It’s very easy to make, also a cute addition to her kitchen play. The basket was made from recycled paper brown bag, I don’t have the tutorial here but it is also very easy to make, pinterest has lots of tutorial of it.


Felt Strawberry fb

A. Cut the red felt in half circle, to get the size of my strawberry the diameter is 3″. Cut the green felt in star shape. Some poly filling for stuffing.

B. Sew the half circle’s ends together.

C. Turn it inside out. continue to stitch around the opening.

D. Put the stuffing, pull  and tighten the thread that you sew in C, secure with stitches.


FElt strawberry 2

The next step is to glue the Green felt onto the top to cover the opening, I use fabric glue. Done!