Brioche Bun with Raisins

I’ve made this recipe several times, and have always been happy with the outcome… I can say that this is fool proof brioche recipe since even me who just started baking bread not long ago can not mess it.

The original recipe is by Simply Delicious, Brioche Loaf.

If you don’t have bread maker or fancy standing mixer,  hand mixer and elbow grease will also do, hopefully this tutorial will help.


raisin brioche 5


  1. In a bowl combine 125ml warm milk, 70 gr sugar, and 10 gr dried yeast.
  2. Let it stand for 5 minutes until creamy and start to froth slightly.
  3. Add 4 eggs, beat with mixer until well incorporated, light, and creamy.
  4. Slowly add 500 gr all purpose flour and 2 tsp salt, continue to mix until all the flour has been incorporated, then continue for another minute. At this stage, the mixture will start to form sticky rubbery dough and your hand mixture might not be able to go further. It’s ok, next step we will continue with hands so you can put aside the hand mixer.


raisin brioche 1


5. Add 175 gr butter, cubed. Butter has to be slightly soft for our hands to knead it.

 6. Knead for 7 minutes. At this point you might wish for kitchen aid mixer to the rescue or doubt yourself whether you are in right direction ( just like I did). Don’t worry, it is a tricky and sticky dough, just try your best to knead it 🙂
7. Remove from the bowl and place it in buttered bowl.
8. Cover with clingwarp, allow to rise for 2 hours. Place it in fridge to stand overnight.
raisin brioche 2

9. The next day, remove it from the fridge and allow to come to room temperature.

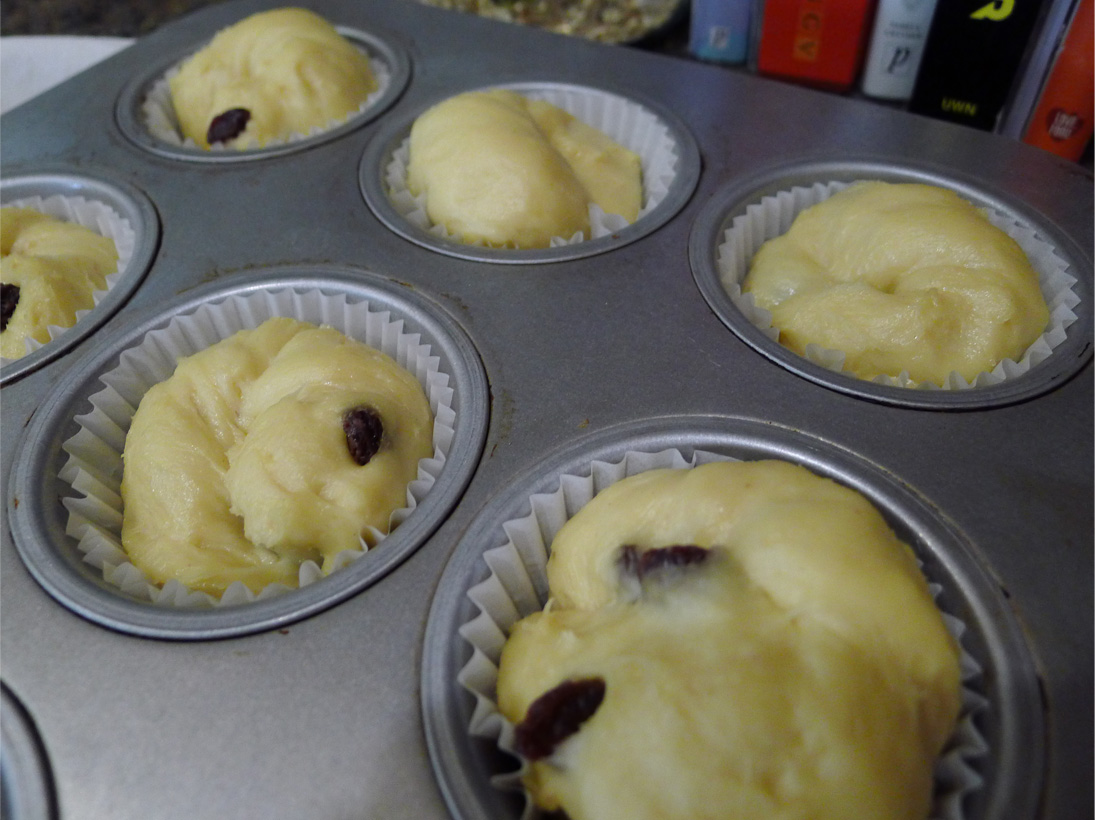
10. Add some raisins ( soak the raisins in warm water first), divide the dough into small buns, place them in muffin tin, cover with cloth and allow to rise for 2 hours.

11. Preheat oven to 180C.

12. Brush the buns with eggwash, bake about 20-30 minutes depending on the size of  your bun, until golden brown.

raisin brioche 3


13. Remove and let to cool.

14. Enjoy!

raisin brioche 4


raisin brioche 6


DIY Sewing Chair Slipcovers

Clipcover 1

This was the sewing project I did for my friend to rescue her chairs. The chair is still in good condition except for its seat area, as you can see the leather cover is slightly ripped. She needed a cover to protect them as her kids like to explore they might use the chairs as their creativity project and causing further damage 🙂

slipcover 3

Slipcover 2

First I made the template for the areas that have curve, drew it on large paper (this one was large shopping bag). Then I transferred the template onto the fabric. For the straight sided area I just measured and drew it directly onto the fabric. Next step was to sew all the pieces together. Didn’t take much time as I initially thought, really enjoyed making them.


slipcover 4


slipcover 5diy


DIY Rustic Picture Frame

Recently we just changed all the windows in our house, there were old one pane wood windows original to the house when it’s built. I actually like those old windows, though they look old and outdated but they were full of characters. Considering how much energy wasted if we keep using them, we decided to changed it, and our power bill went down right away the next month after installation.

I kept one window, picked the best looking one, and use it as picture frame. Instead of refinished it I used it as it was after cleaned it thoroughly. I like how its scratch, old paint, chips, dents, holes tells the story of it existence. Thank you for being the window for this house for 24 years and I’m grateful how it now serves its new role as Rustic Family Picture Frame.


Rustic Pic Frame 1

I printed the photos in black and white 6x8inch, I think this is the best in this project… Sepia will do well too.

Rustic Pic Frame 2


Make a mat to get a center and uniform position, so you don’t have to measure the frames one by one.

Rustic Pic Frame 3

Rustic Pic Frame 4


Love how it turned out. Hope this inspires you!

Rustic Pic Frame 5