Crochet Coaster – DIY

I made these coasters for housewarming gift, I don’t have the crochet pattern for this project though .. sorry. What I did was making 4 chains, sl st together to make a circle then sc along the chains. In the inner round I did 2 sc at the same space, when the circle got bigger I reduced the count. I added sc at the same space whenever the edge began to curl, otherwise 1 sc for each space. The good news is I have the pattern for the flower edge 🙂 It needs 4 chains space for each : 1 sc, 1dc 1tc at the same space, 1tc, 1dc 1tc at the same space , repeat.


coaster 1


coaster 3


coaster 2


Crochet Flower and Planter – DIY

Do you like collecting plastic or glass containers? I do, chobani yogurt container is among them. I usually use it for flower and vegetable seedling before transplanting to the garden. Looking from its shape, it pretty much resembles the flower planter which brought this idea of making mini flower and planter for my baby’s room decoration.


planter 1

I used single crochet following the shape, just add or reduce the count whenever needed.

planter 6


plantar 7


plantar 8

The original flower pattern is found here, but I modified mine by adding rows to get bigger flower.

plantar 9


plantar 10

For the stem I did chains to wrap the wire then attached it to the flower.

plantar 11

I don’t have pattern for the leaves, they all are vary in shapes and sizes, basically just round oval pattern.

plantar 12

Attach and assemble the flower into the planter.

planter 2


planter 3


planter 4


planter 5

Crochet Placemat with Batik Edge Binding – DIY

Balik lagi ke crochet addiction, kali ini idea nya dari link di sini. Sebenarnya versi original nya sudah cantik tapi rasanya kurang seru kalau cuma mengcopy paste apa adanya saja. Nah biar lebih fun saya modifikasi sedikit pattern nya, baris 18 dihilangkan dan langsung diakhiri dengan single crochet untuk trim nya. Sesudah itu tinggal menambah edge binding dr kain batik perca.

crochet placemat

Pas ngambil photo, jadi muncul idea memajang piring “bersejarah” ini. Critanya ini piring sudah travel 1/2 lingkaran bumi dari Pontianak sampai Atlanta. Ini piring peninggalan keluarga suami, dari generasi kakeknya. Walaupun bukan piring mewah atau fancy, tp sejarah keberadaan nya sudah cukup membuatnya istimewa… apalagi kalau membayangkan si little M akan menjadi generasi ke 4 yang memakainya.


crochet placemat 3

crochet placemat 1

crochet placemat 2

Embroidery Hoop Wall Decor

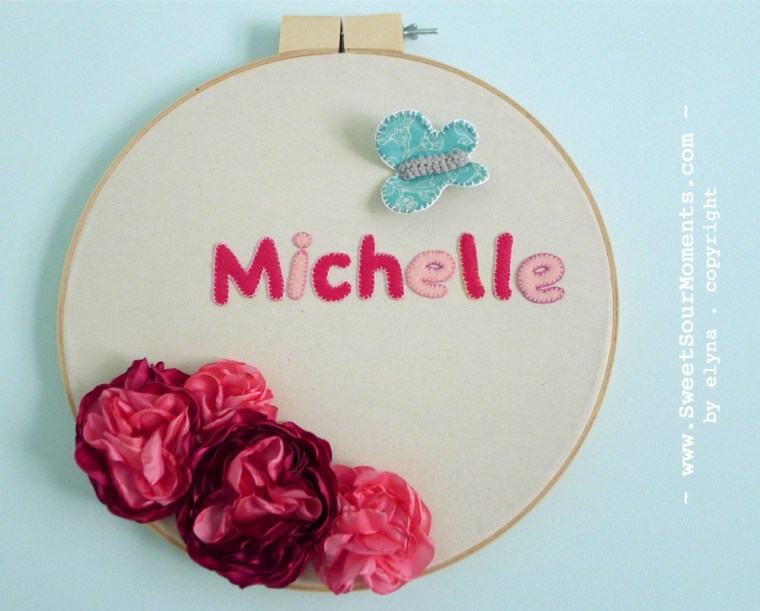
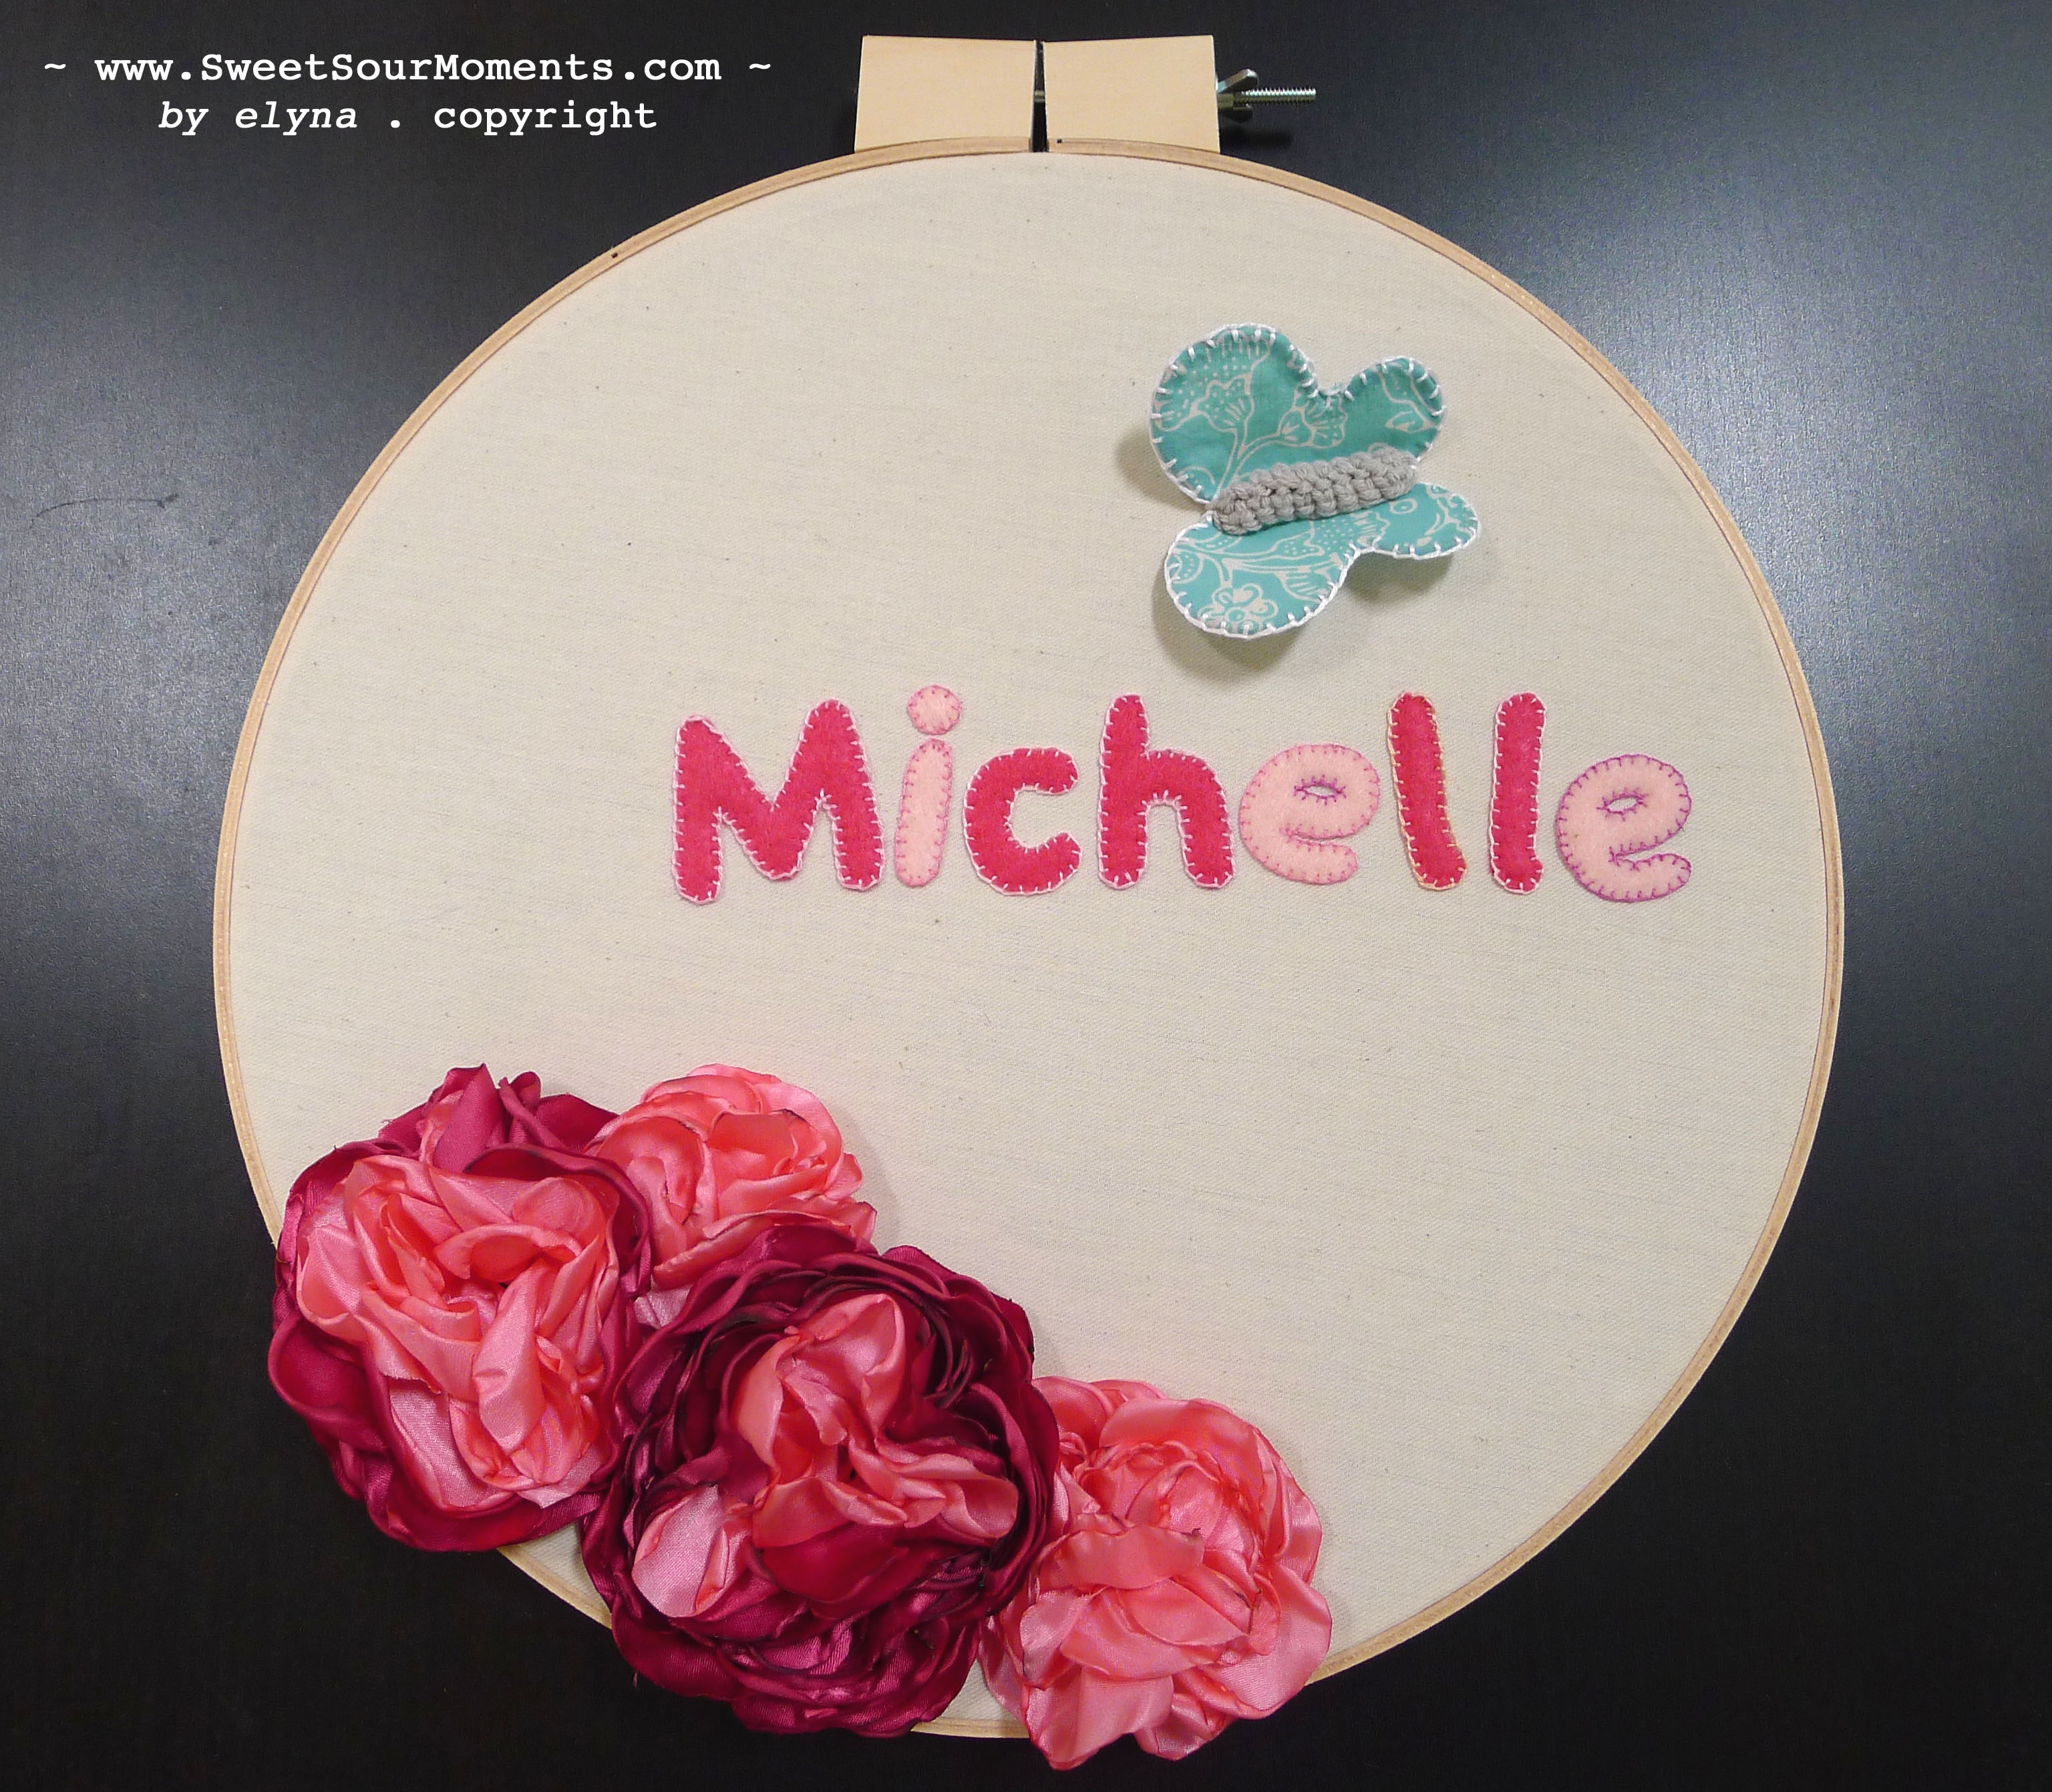
I’m sure you’d agree with me that Pinterest is a fantastic source for ideas and inspirations. I could spend hours just looking at tons of pictures there, well that’s before I have my little M … now I’d be lucky to be able to visit it once a day :). There was a pin in home decor section using embroidery hoop for wall decor, the inspiration for my project to make DIY wall decor for my baby’s room, so here it is hopefully it inspires you too!

hoop 12

1. Attach the fabric background onto the hoop. I used plain creamy fabric to get vintage look.

hoop 1

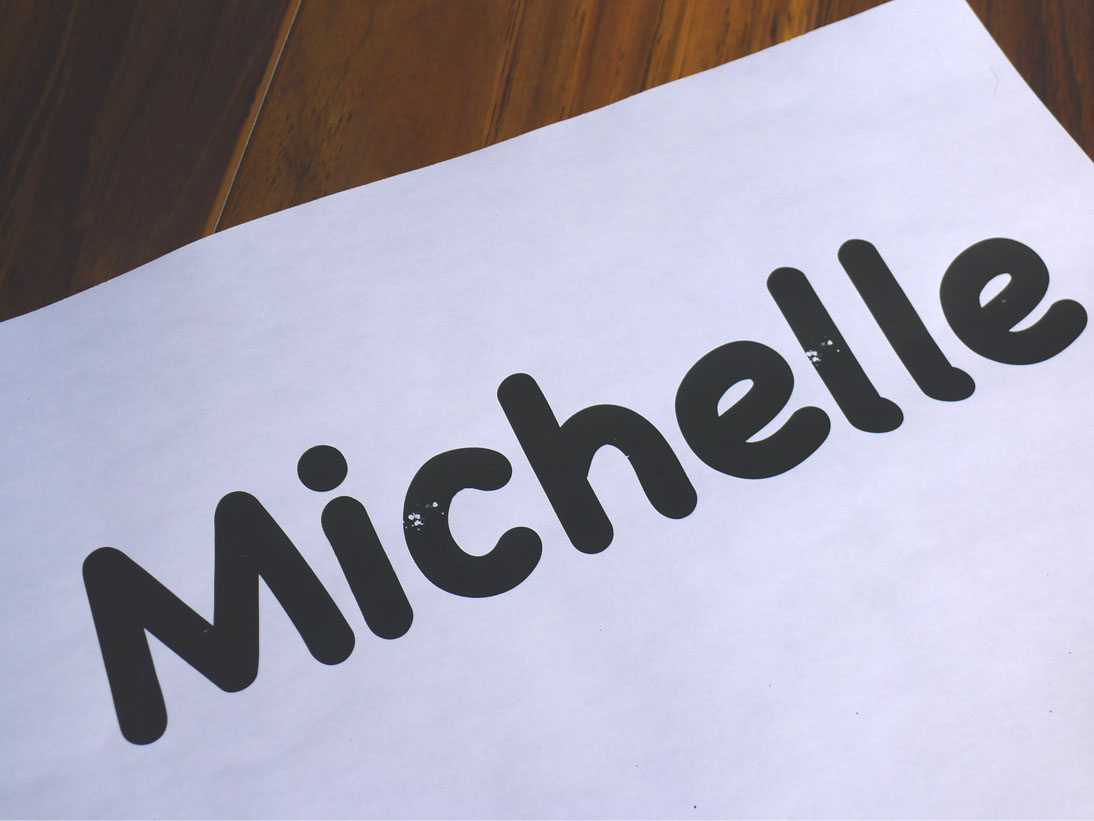
2. Print & cut the letters, trace & cut the felt.

hoop 2

hoop 3

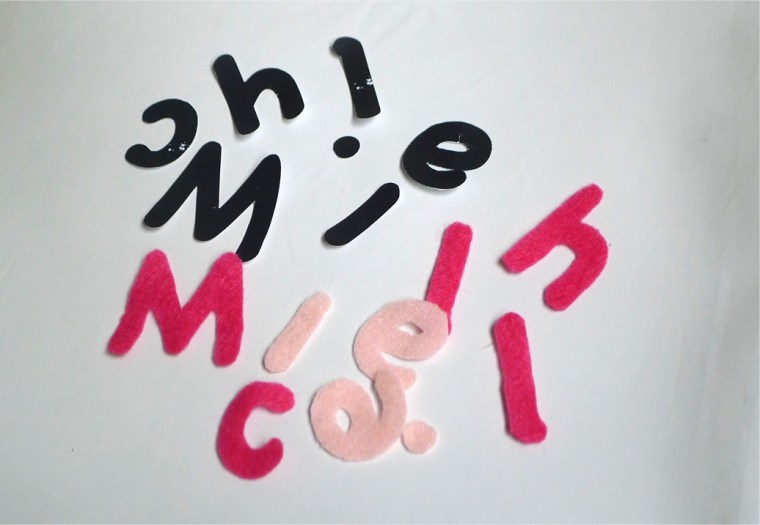
3. Stitch the felt letters to the fabric.

hoop 7

hoop 8

4. Satin Peonies.

You can find many videos in youtube about how to make fabric flower with this technique. To get a nice layer I used more than 1 color, cut them in 3 diameter sizes, cut the edge into 5 parts,  slightly burn it, then stack them together and secure by stitches. I made these flowers last year, actually I was thinking to make them as headband, so I don’t have photos showing details step by step, sorry :(.
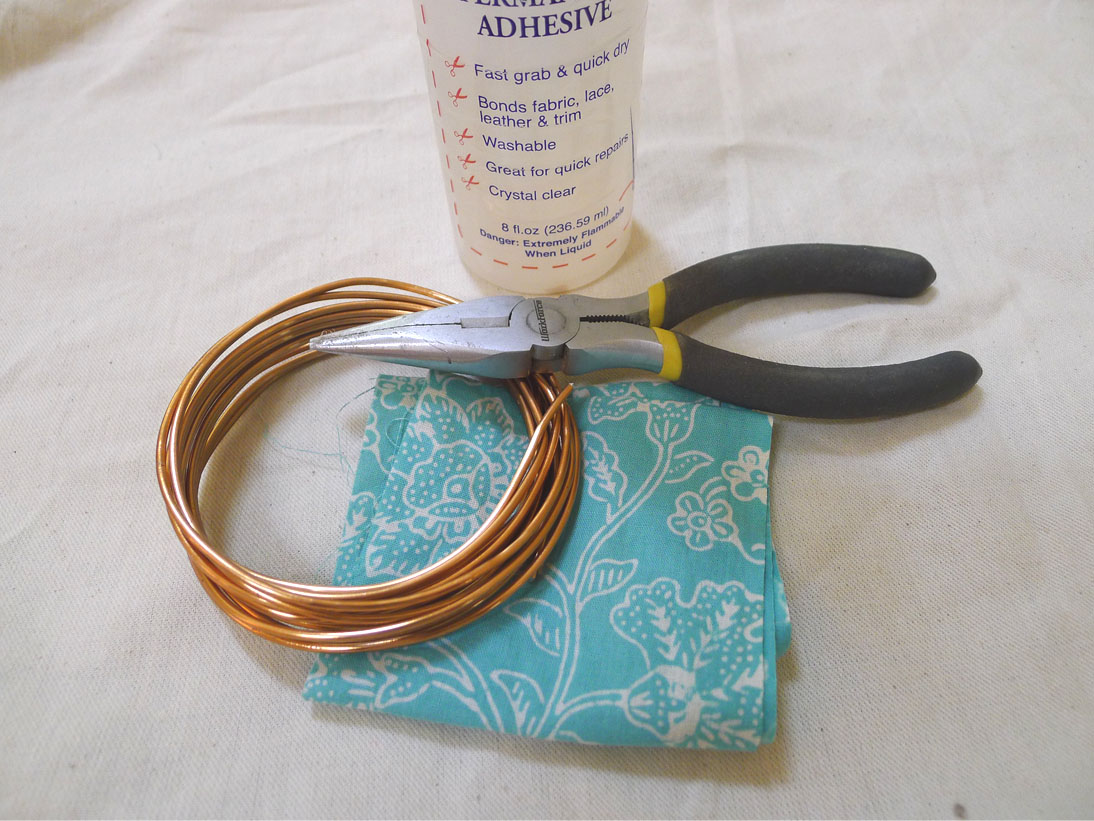
hoop 4

hoop 5

hoop 6

5. Cute butterfly

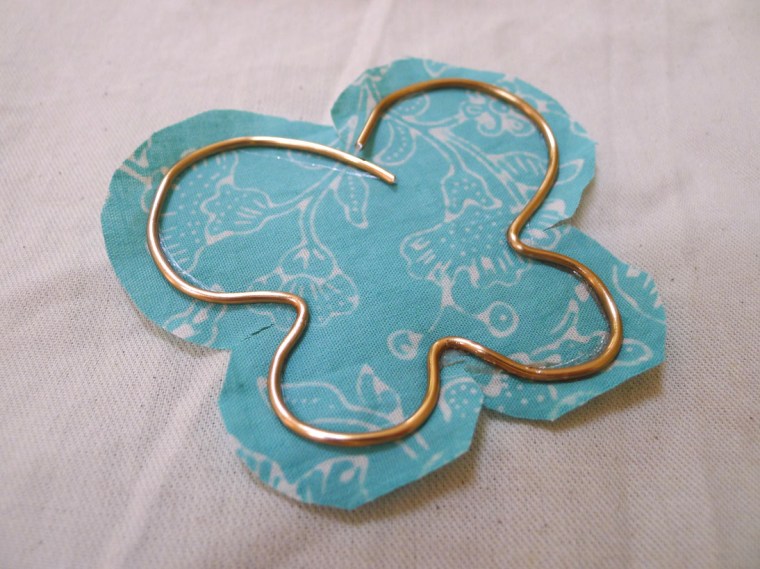
To add contrast to the pink color theme I used aqua blue scrap fabric from last batik project, wire for the wing frame, and crocheted gray yarn for the body.

hoop 9


hoop 10


hoop 11

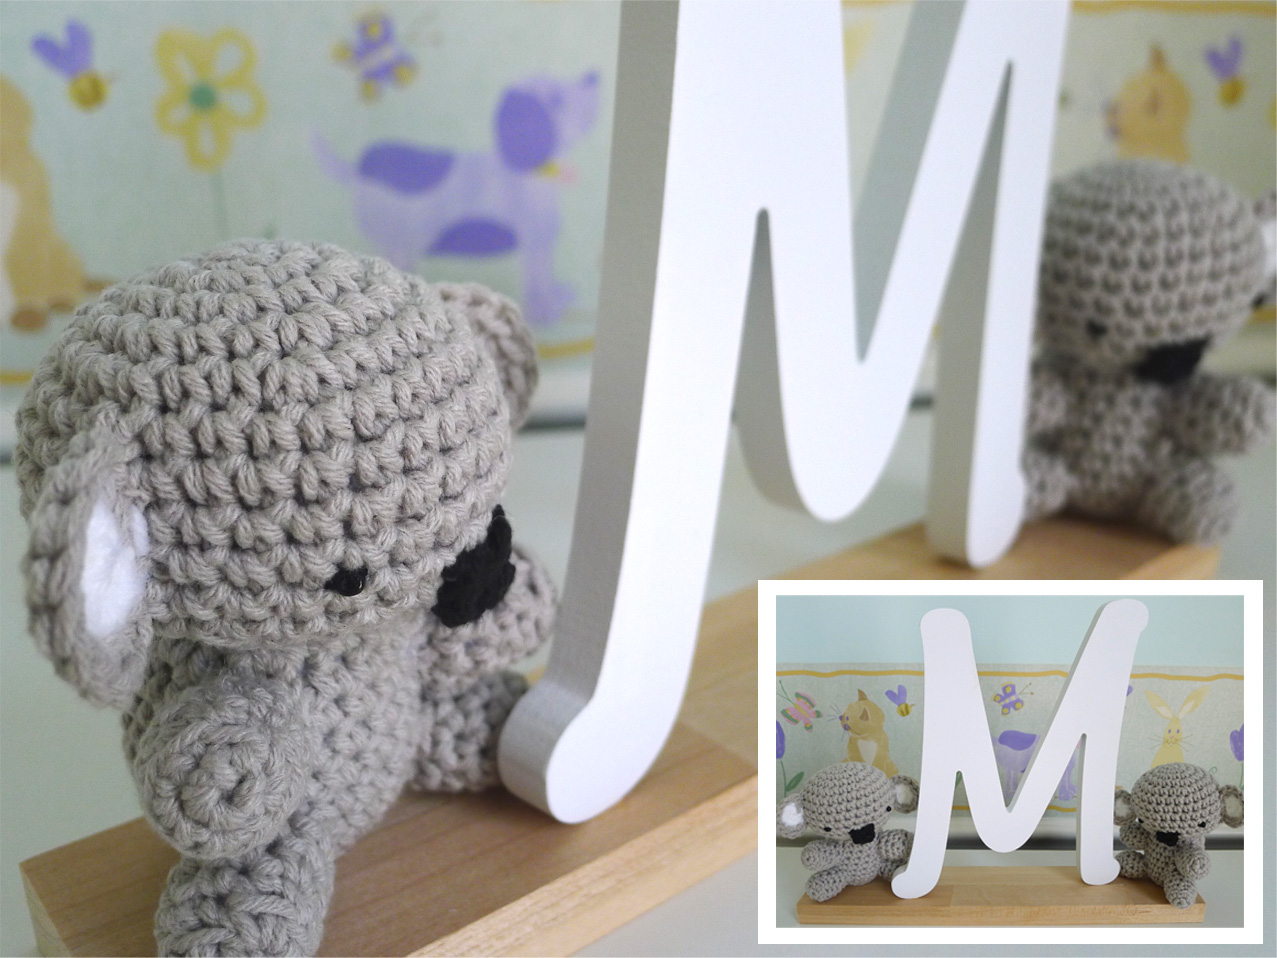
6. Put all together.

hoop 13


hoop 15


hoop 14

Koala Crochet & Initial Art – DIY

When I found the crochet pattern (link : Koala pattern) for this cute Koala, I couldn’t resist to try it right away … such a cute amigurumi. I made  a pair of it then put them with M wood initial for my baby nursery. Hopefully my little M will like it as much as I do …happy with how it turns out.

M is for Michelle


Making each parts.

Koala 1

After stitching all parts together.

Koala 5

A pair of it posed together 🙂

Koala 3

Koala 4

Koala 2

The wood initial for my little M.

Koala 6

Done!!

Koala 7


Koala 8