
We have these 2 nooks beside the fireplace that are designed for built in bookcase.

Rather than went with conventional built in style we chose the modern and simple design. Although it’s simple it gives a strong statement and really defines the room.

I followed the tutorial from this link:
https://www.bloglovin.com/blogs/yellow-brick-home-1388645/diy-floating-wood-shelves-4310783535
Here is the process done in my house, lots of picture and less words 🙂
- Prepare the frames using 2×4 woods.

2. Attach the frame to the wall. Use the stud finder to locate the wood frame behind the drywall.

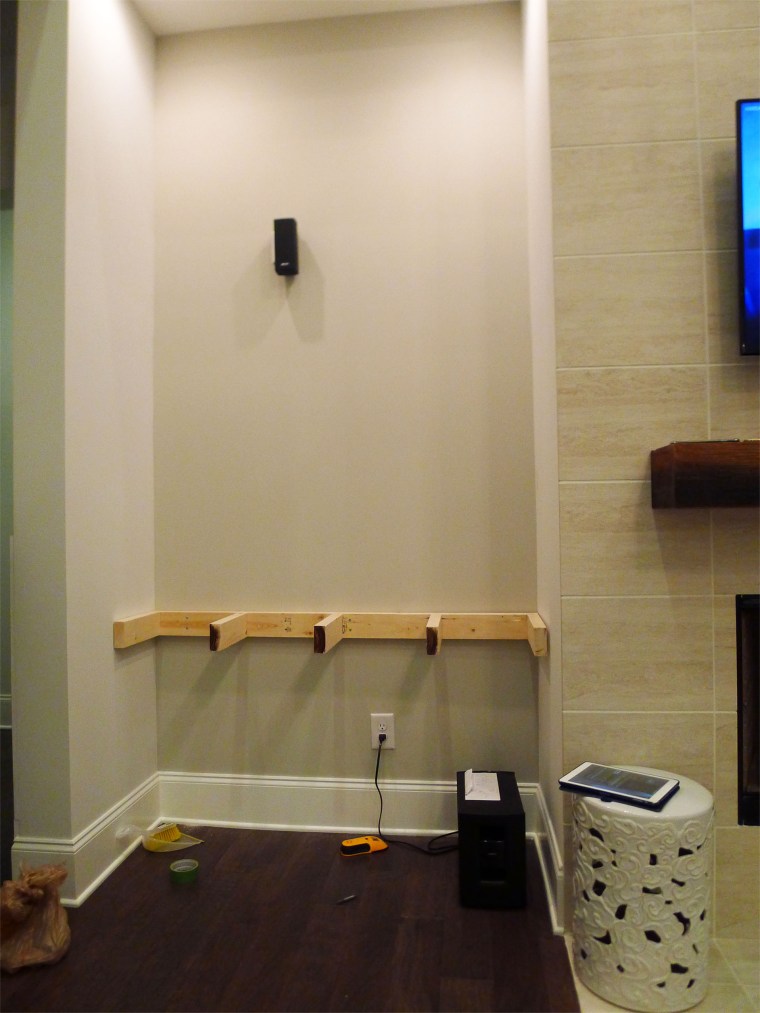
3. Attach the front rails.

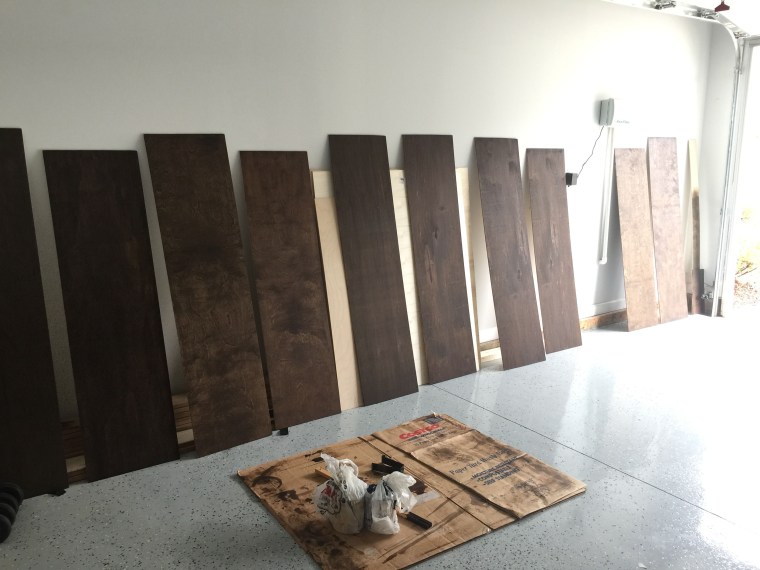
4. Prepare the wood strip covers for front part and plywood covers for top and bottom. This step involves tons of sanding, staining, poly. The more sanding and poly you do the smoother the looks.
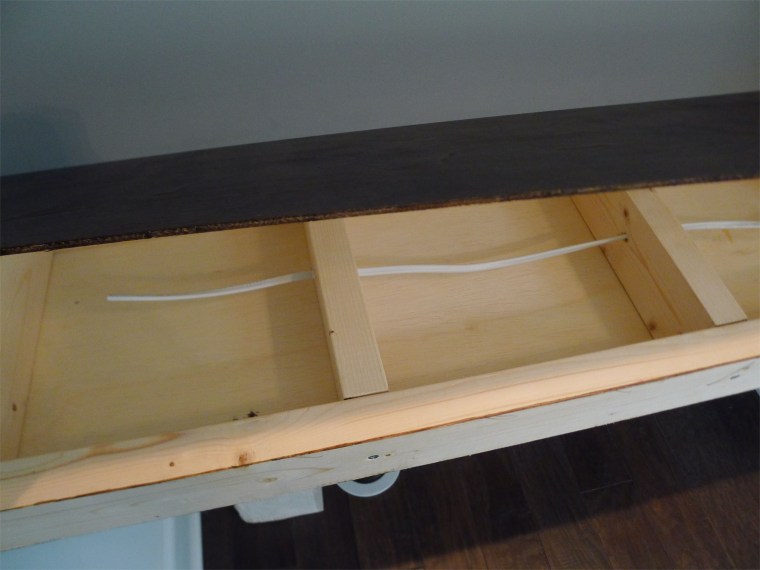
5. This step is when you are planning to install recessed lighting on each shelf. Attach the bottom part first and run the wire inside the frame. Once the lighting is set then you can cover the top part. I also applied wood glue around the perimeter before you put nails, to prevent any gaps, in case the nails get loose at any point of time in the future.
6. Laminating the front part with wood strip.
We got so lucky my friend gave us these 1″ thickness woods from bed rails that fits perfectly.

7. Hope it inspires you!

