Baby Nursery – part 1: Wall Mural DIY

Decorating baby nursery is all about fun! The hardest part was actually picking the color … For my baby girl, I want her room to feel neutral with girly touch here and there, definitely not pink room. The theme is sunshine in the morning sky (sounds like movie or song ^.^ ), the color pallet is orange and blue. I made several DIY projects for this baby nursery which will be posted separately, so don’t forget to return to my blog for future posts 🙂

Part 1 of baby nursery project is wall mural.

baby nursery wall 1


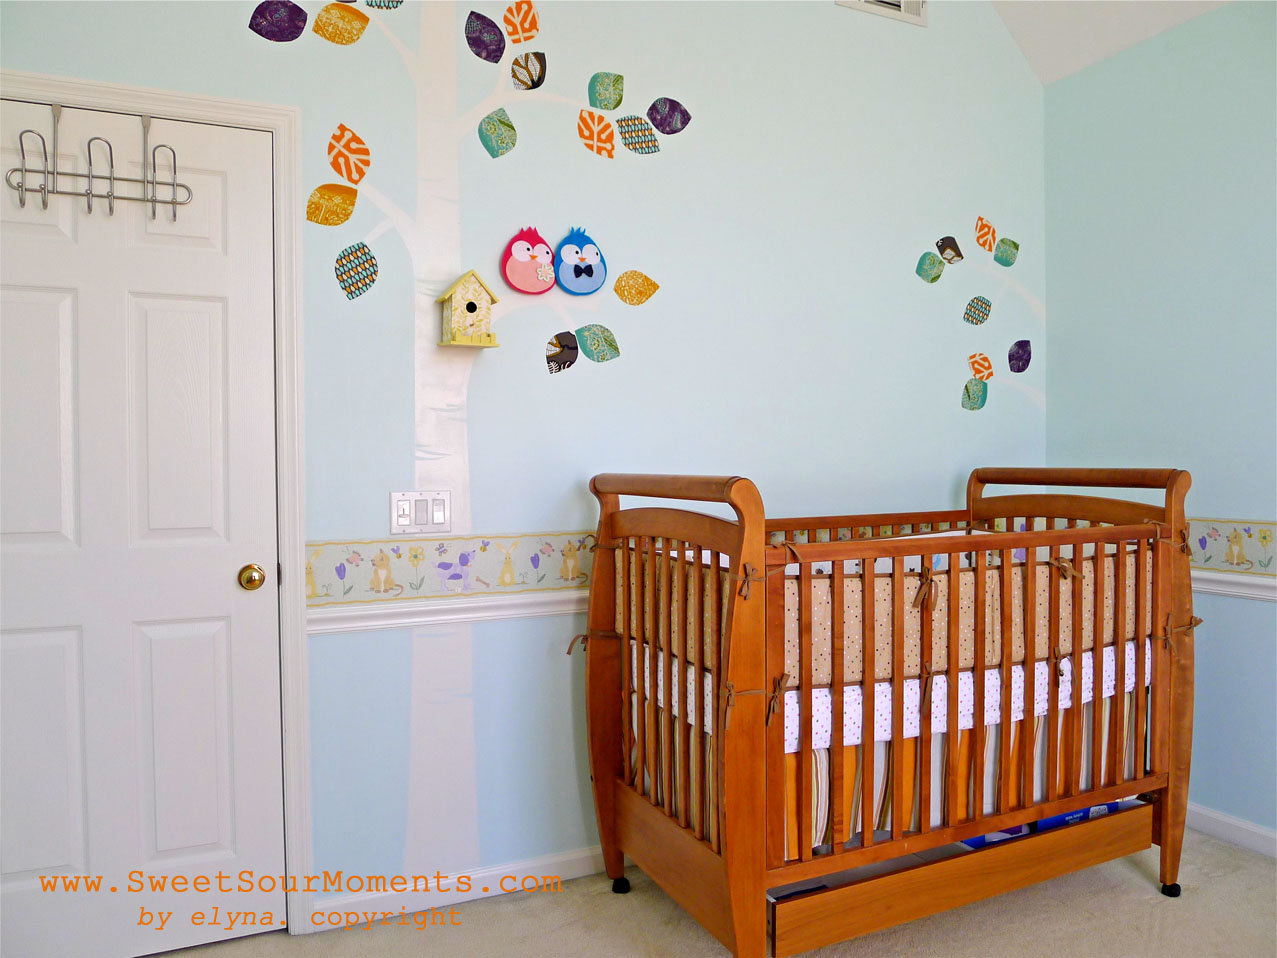
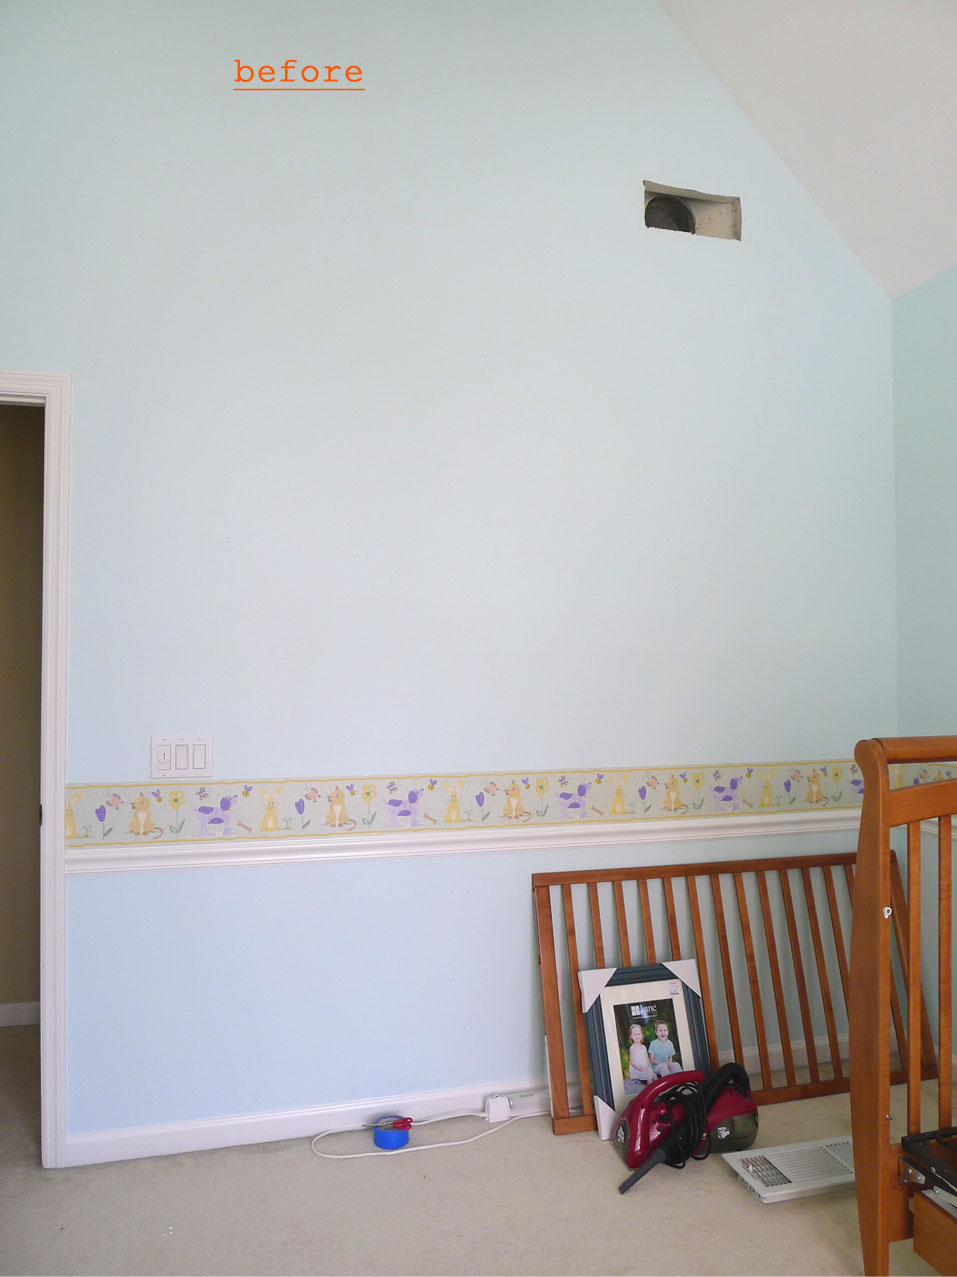
The room has the wallpaper border around above the chair rail. Since it’s still in good condition and works well with my decor plan, I decided to leave it and go ahead with painting the wall.

baby nursery wall 2


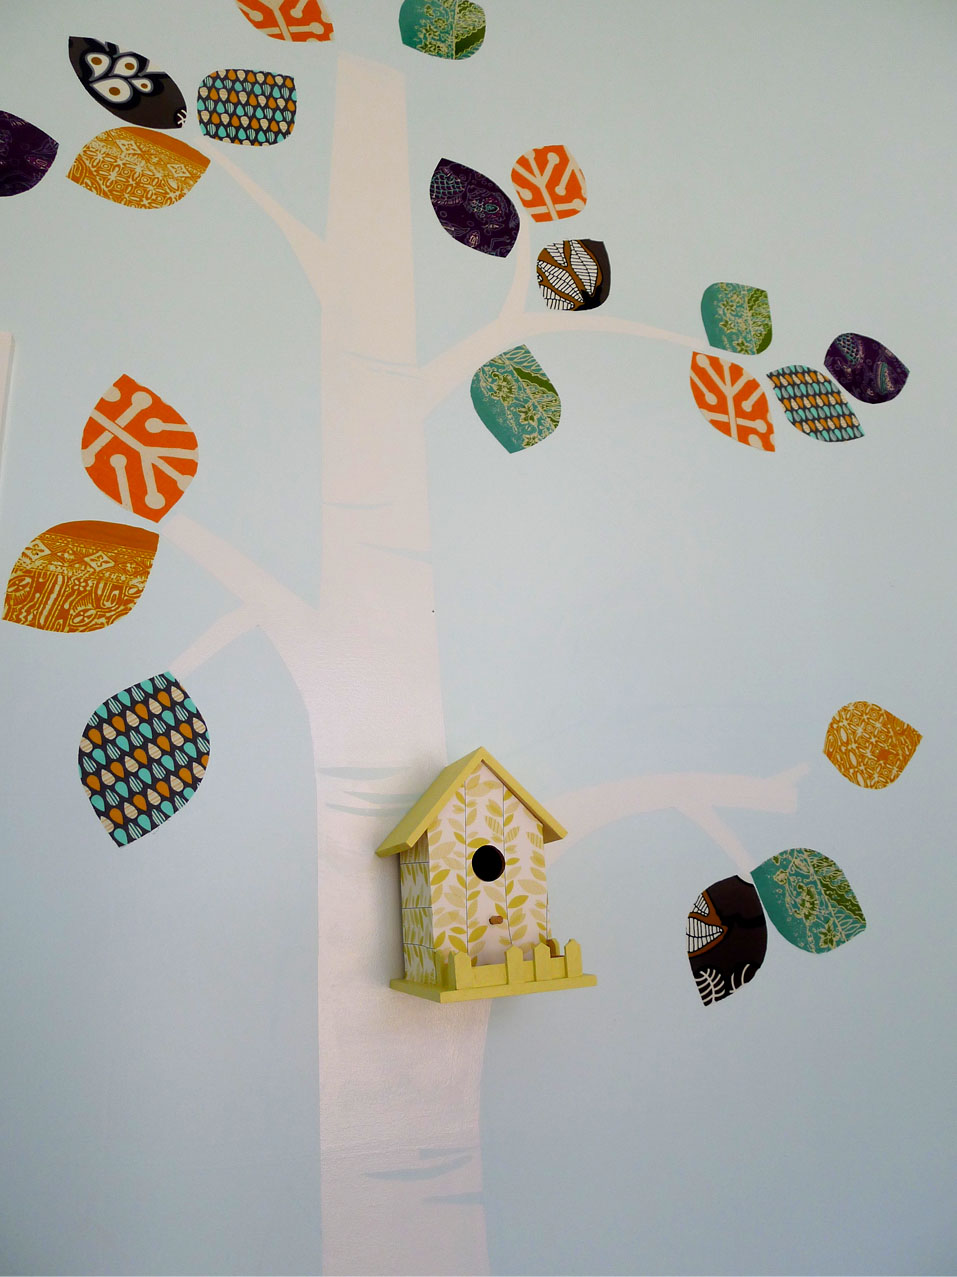
Next, drawing and painting the trunk.

baby nursery wall 3


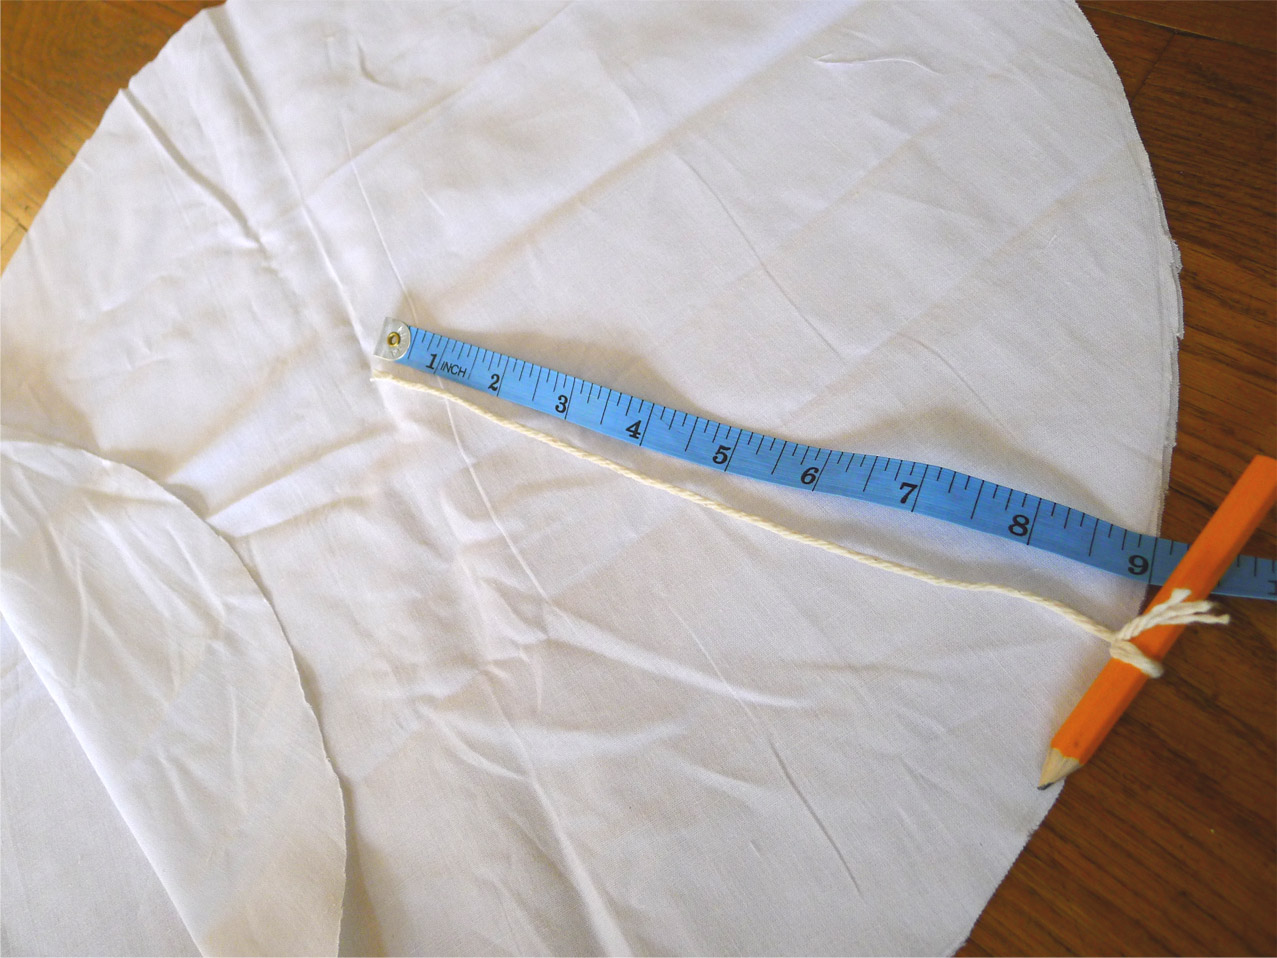
Preparing the leaves using scrap fabric.

baby nursery 4


Attaching the leaves. Spray wet and thoroughly the fabric with liquid starch (for ironing the cloth). When dried it will stay nicely on the wall.

baby nursery 5

baby nursery wall 6


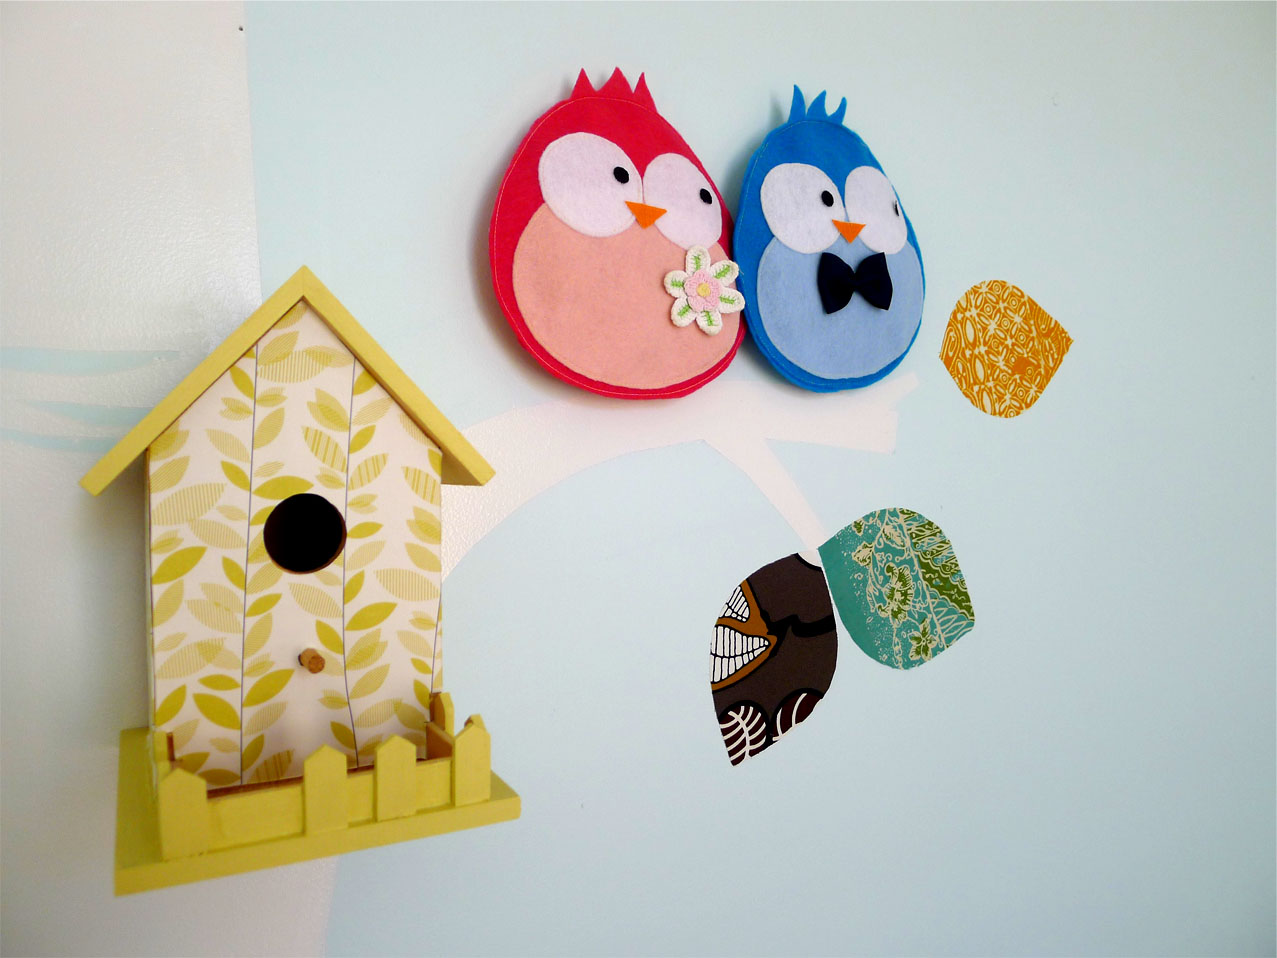
The bird house. Got it for $1 at JoAnn during sale. Painted with left over dining room yellow color paint then covered with wrap paper.

baby nursery wall 7

baby nursery wall 8


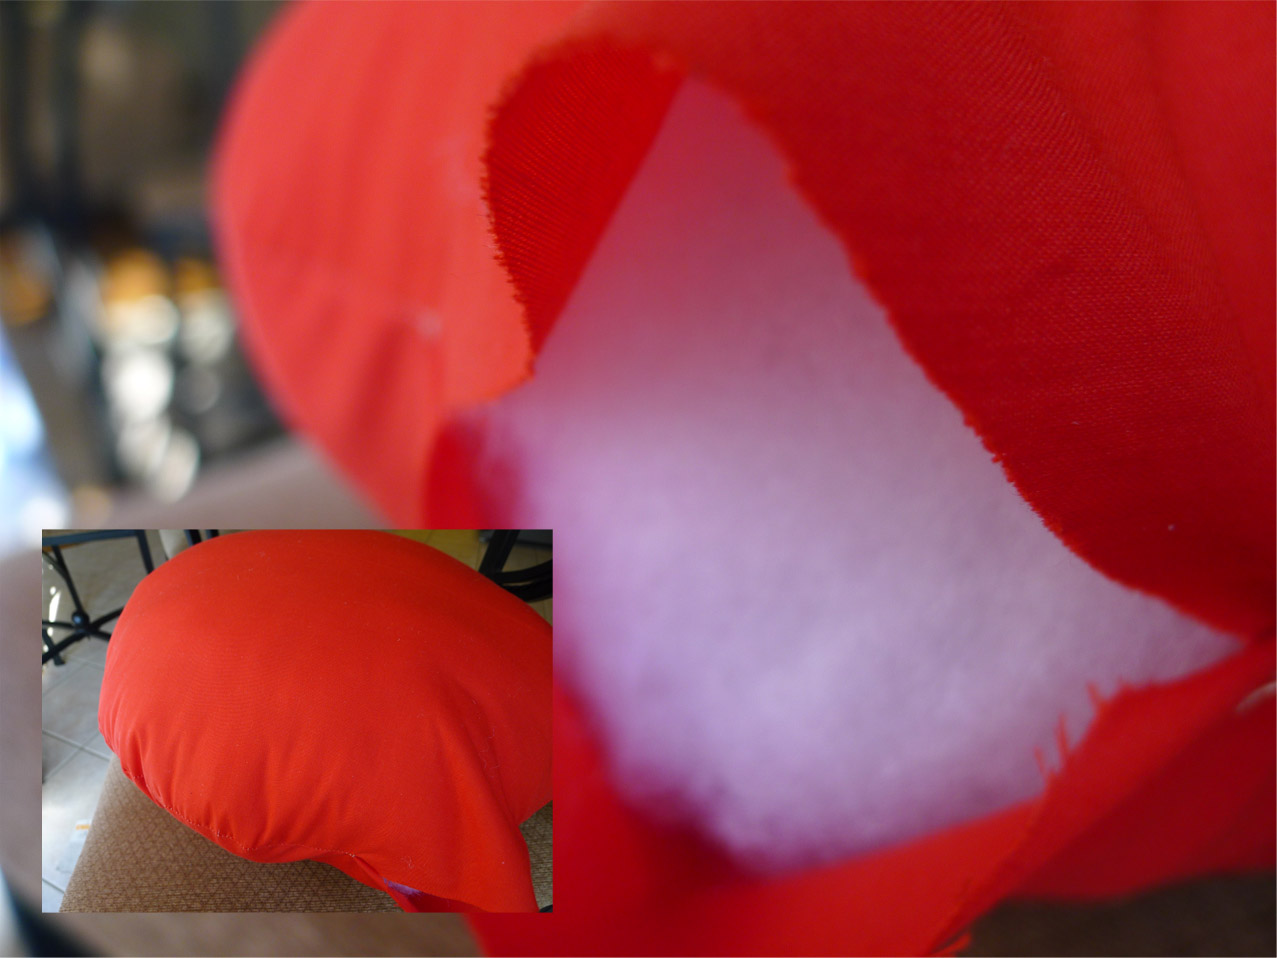
The Birds. I Saw these birds at Etsy shop, it looked quite simple so I just DIY-it. What you need is felt, orange & black scrap fabric, and extra accessories to dress them up.

baby nursery wall 9

baby nursery wall 10


baby nursery wall after

Round Pillow – DIY Crochet

I am recently into crocheting so much this is my 3rd post in row about my crochet projects. Pattern for this round pillow can be found at http://www.redheart.com. I used Lily Sugar’n Cream 100% cotton no#4 yarn with H hook.

Round Pillow


Each pillow needs 2 round pcs, 1 with ruffle and the other without ruffle.

Round Pillow 1


Round Pillow 2


Round Pillow 3


To make the insert pillow, cut 2 pcs 18″ diameter fabric, sew the wrong side together then flip, fill with poly fiber, then sew close. (I drew the circle using pencil tied to a piece of 9″ long yarn)

Round Pillow 4


Round Pillow 5


Finishing : Stitch 2 round crochet pcs together with pillow insert inside, it might seem tight but it will eventually stretch to fit the pillow nicely.

Round Pillow 7


Round Pillow 6


Guest Bedroom Decor Revealed – DIY

Finally, guest bedroom project is finished, actually I finished it last month but hadn’t had chance to update the post for a while.

guest bedrppm reveal


The DIYs for this room can be found here :

circle wall stamp : https://sweetsourmoments.com/2012/10/25/wall-stamp-to-save-wrong-paint-color/

customized curtain : https://sweetsourmoments.com/2012/11/06/customized-store-bought-curtain/

pillow shams : https://sweetsourmoments.com/2012/11/05/pillow-sham-diy/

bedside table : https://sweetsourmoments.com/2012/11/08/budget-bedside-table-makeover-diy/


Budget Bedside Table Makeover – DIY

So here is another project again as the result of wrong paint color in guest bedroom, remember that I need to adjust the decor to the gold circle accent wall? I was planning to have classic gold bedside table and I don’t want to buy something new just to be painted in gold, but it’s also not easy to find bedside table in the gold color that matches that gold accent wall. So the realistic way to accomplish the mission is to do the makeover. I actually not a big fan of painted furniture, I like to see the beauty of original wood grain and texture on it. Unfortunately, I have to paint this piece due to 2 reason: to match decor of the room and the bottom of the bedside table I bought was in bad shape. I’m quite happy with how it turns out, for my 1st furniture makeover, it’s not bad 🙂

1. The condition when I got it, for $5 from garage sale you can’t expect much.

2. A. cut the bottom part; B. put the primer coat; C & D. primer finished.

3. Attach the bracket for new leg. The new legs adds more classic look which I want.

4. Attach the painted gold leg.

5. Painting the 1st coat of gold and white.

6. After 3rd coat.

7. Add knobs which I got for less than $2 for all three of them (a steal from Worldmarket). Like the rustic look with gold accent.

8. I interchanged the direction of paint brush between vertical and horizontal to give this antique linen look.

9. Finished.

Customized Store Bought Curtain

Still working on the guest bedroom, now is the window dressing. I saw this nice pair of curtain in clearance section, yes I knew the height is less than what I wanted but I like the fabric very much, it’s sheer fabric with satin strips and its color is just what the room needs, combination between gold and khaki, and the best thing is the price, perfect! To make it works and also to give my own personal touch, I decided to add linen fabric and satin ribbon.

1. The Linen and Satin ribbon.

I think Linen makes a good pair with sheer fabric, it adds texture. The Satin ribbon mimics the Satin strip on the original curtain.

2. Sewing the Ribbon and Linen.


3. Window dressing : check! one more item removed from the list.